WarLark 80 Micro FPV drone

The Warlark comes packed with features for a micro brushed quad, like OSD and Cleanflight. It generally flies well in the house, although it is a little bit twitchy and the VTX is prone to overheating if you don’t start flying within a couple of minutes (I sat around adjusting the OSD for a while and learned the hard way that the VTX overheats without air flow, and then shuts down the whole quad).

Specifications

WarLark 80 Micro Quad

Wheelbase: 80mm

Weight: 36.6g (with battery but without canopy), 38g (with battery)

Flight controller: Scisky Micro F3 Brushed FC+ receiver +VTX 25MW +Camera

Firmware version: Cleanflight 1.3.0

Motor: 0716 Brushed Motor

Prop Size: 35mm 4-blade prop

Battery: 250mAh~300mAh 3.7V (Recommend Tattu 3.7V Lipo battery)

Receiver: Built-in Frsky compatible 8ch SBUS receiver/ Flysky receiver/ DSMX/DSM2 receiver/Futaba SFHSS

OSD: VTX comes with an OSD

Camera: 600TVL HD CMOS 1/4 inch Camera

AV Wireless Transmitter: 5.8g 25mw 40CH

Flight time: 5 minutes

And next let me have a detailed introduction about WarLark 80 Micro Quad.

Frame

The frame is very durable, well made and designed with one major exception. The USB port is positioned very close to and right behind one of the frame members. This prevents a USB plug from lining up with it sufficiently to plug in. The only way I was able to get mine to plug in was to actually flex the frame a bit. That worked, but when you let the frame relax, it places upward tension on the plug which is transferred to the port on the board. In retrospect I should have shaved a little of the housing of the plug I was using. The frame member cannot be moved down as it would interfere with the placement of the battery.
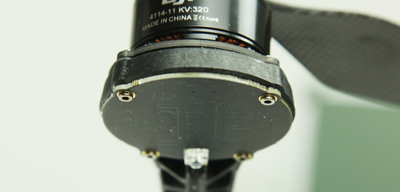
WarLark 80 Micro FPV Quad

Motors

This machine comes with 0716 Brushed Motors installed. So far they have been reliable and are adequate for the job. These motors plug into the FC so you don’t have to solder them. I have not (yet) seen replacement motors so I can only assume they are shipped with connectors already soldered to the wires.

Camera

This camera is somewhat proprietary in nature. The camera PCB is constructed with small “ears” on each corner so that it will fit into the mounting system (which is adjustable). The bottom two ears fit into slots in a piece that screws to the bottom of the two front ducts. By loosening these two screws the holder can be moved down and the camera rotated to any of five positions for optimum viewing angle.

Battery

Mine was supplied with a 1S 300mAh 35C battery, and I recommend Tattu 3.7V Lipo battery. The battery comes down hot. Even during “mild” flying, the battery is very very warm. It also appears to be puffed slightly after each flight. Some of this may be “normal” just because of the high current drain from such a small battery.

WarLark 80 Micro FPV Quad battery

This is a very good little flyer. The frame is strong and it’s very stable and forgiving.

Overall, even with all the little issues, this is a lot of fun to fly. However, given the issues with the camera, and the frame, I am not sure I could recommend this quad.


Rotorx Atom V3

Have you heard RotorX Atom V3? I read an article about RotorX Atom V3 from  http://rcfpvplane.com/ and I will share it for you.

RotorX Atom V3 is a 122mm Mini Quadcopter and weights less than 250 grams, small size and light weight; You can put it on your hand, but don’t be fooled! The Atom accelerates faster than a FORMULA 1 Car allowing you to enjoy FPV Racing without all the stress maximum agility, enjoyment and no limitations! No FAA registration needed.

Rotorx Atom V3 Build

The RotorX RX122 Atom V3 is one of the most advanced micro drones on the market. RX122 Atom V3 is the child of the marriage between Team Black Sheep and RotorX. This micro drone features a compact yet advanced brain, TBS RxCube, engineered by the great guys at TBS specifically for Atom V3. Atom V3’s brain is a stack design containing a flight controller, ESCs and a VTX/OSD combo. Atom V3’s electronics are housed in an indestructible polycarbonate canopy that comes in variety of colors to suit your preference.

Features:

Addressable LEDs can be set to any color you desire

Just the basics, to get you in premium gear you can grow with

Smooth and locked-in tune – Thanks Magnus from TBS and our RotorX team pilots

Industry leading electronics from TBS and Highest performing drivetrain from RotorX

You can buy the RotorX Atom V3 on FliteTest:

Includes the core components:

FC, ESC’s, T-Motors 1406kv Motors, OSD, VTX, FPV Camera, Frame, Canopy

DSMX Compatible Radio, Goggles

Motors, Props, Flight Controllers, ESC’s, Canopies And OSD/VTX Boards

You can buy batteries on GensTattu:

There are two choices for you, the 4S or 3S?

3S Battery: Tattu 850mAh 4S 45C Lipo

4S Battery: Tattu 850mAh 3S 45C LIPO.

What about it? If you want to get one, you can buy it from Flitest.

How to start a ImmersionRC Vortex 250

This is a guide about how to start a ImmersionRC Vortex 250, I will walk you through the initial setup process for your vortex 250 pro FPV quadcopter. It is supposed to be used alongside the main vortex 250 manual.If you have any questions about it, you can leave your question on my blog and I will reply you in the first. Next let me begin this guide.

What else do I need to fly the vortex?

The vortex 250 arrives fully assembled but you need to add your own battery and R/C receiver in order to be able to fly your quadcopter. A FPV camera and transmitter are also built into the vortex, but you will also need to use some FPV goggles, or FPV monitor to fly this drone in first person view. However here are our suggestions on the extra equipment needed for the vortex 250.

Battery– The vortex can pull of 80A during full power climbs so regular batteries are not suitable, you can use either a 3S or a 4S setup depending on your experiance. Just make sure the battry can supply suffienct current to the motors, so a 60C plus battery should be used.

3S Setup – Tattu 1300mAh 3S 75C

4S Setup – Tattu 1300mAh 4S 75C 

R/C Radio and Receiver– FRsky Taranis Plus with X4R-SB (preferably bind in CPPM mode)368 or D4R-ii receiver.

FPV Goggles– Fatshark Attitude V3130 or Fatshark Dominator v3

First time setup

In this video you will go through the entire setup process of setting up your Vortex 250 Pro for the first time using a FRsky Taranis and a D4R-II receiver. The first step it to bind your receiver to your taranis and set your D4R/X4R to output CPPM, this is so that you dont need to modify the included R/C receiver cable on the vortex. In the case of the X4R-SB receiver you should bind it with the jumper across CH2 and CH3.

The video also shows you how to setup a model on your taranis radio for the vortex. In the case of you using the D4R-ii you will need to set the taranis to D8 mode, but if using the X4R receiver (if using EU firmware on your taranis) set it to D16 mode.

Setting up the vortex with Spektrum DX18

Advanced setup

In this video Freybott walks us through some of the advanced settings and pro tuning setups available on the vortex 250 pro. He shows us how this can all be done via the R/C controls and the OSD menu. Settings include setting us the OSD, LED’s, Video TX, Game Setup, Flight Controll, and Pro-tuning.

Using SBUS/Spektrum with Vortex 250

By default the vortex 250 includes a CPPM cable to connect to your receiver, so that is why I suggested you bind your X4R-SB receiver in CPPM mode. However if you want to use SBUS/Spektrum you will need to open the vortex up and install the Vortex Spekrum cable. For full details see the official vortex 250 quick start guide. This involves removing 10 screws on the top of the frame so that you can access the flight controller board to plug in the SBUS cable.

DJI Multirotor-spreading wings S800

I think most drone/UAV hobby players are very familiar with DJI, like DJI Phantom 1, Phantom 2, Phantom 3, Phantom 4, Phantom 4 pro and DJI Mavic pro; because these DJI products are all very famous on the world, and DJI has became the largest UAV company, they have many other products you have not know. We have knew these DJI Phantom and Mavic are all quadcopter, DJI has many Multirotors, like DJI spreading wings S800.

About DJI spreading wings S800, I just know it not long ago. The same to you, I only know Phantom and Mavic in the past, I got the information of DJI spreading wings S800 from GensTattu.com, in my opinion, I think DJI produce quadcopters, Yuneec produce Multirotors, now I found I’m wrong, so I have a deep to know DJI spreading wings S800 and tell you what I have knew.

DJI spreading wings S800 is a Professional Hexa-Rotor Platform, it is still used to shooting, but S800 with 10000mAh 6S lipo(Tattu 10000mAh 6S lipo is design for DJI S800) can Load Weight about 2.5KG, 10000mAh lipo can provide enough power to power S800 take 2.5Kg things, the Phantom 4 pro with only 5000mAh battery can’t do it. And on another way, S800 is very Stable.

Professional Hexa-Rotor Platform

dji-spreading-wings-s800

A built-in damping system allows the S800 EVO to be assembled without additional frames and dampers. The system helps minimize size, reduce weight and simplify assembly.

Circuit-Integrated Center Frame

circuit-integrated-center-frame

All circuits from your powersupply to the electronic components are integrated into the center frame, which simplifies the wiring, reducing the possibility of malfunction and increasing the ease of maintenance.

Integrated Frame Arm Design

integrated-frame-arm-design

A power and signal wires for the motors, ESCs and LED indicator are integrated into the frame arms, resulting in a simple, neat appearance The overall design is safe, reliable and stable, which has been proven by our extensive testing.

Integrated ESCs

integrated-escs

All Electronic Speed controller (ESC) components are installed beneath the motors, solving the problem of heat dissipation. LED indicators are included to help you easily identify the nose and tail of the S800.

High Performance Brushless Motors

high-performance-brushless-motors

High performance brushless motors reduce noise and vibration, enabling smooth control while, improve the stability and performance of aircraft, and simplify maintenance, extending its lifetime.

Efficient Carbon Fiber Propellers

efficient-carbon-fiber-propellers

Tested for perfect balance, the S800’s propellers have an exquisite appearance, light weight, high efficiency, and high strength.

Clear Installation Labels

clear-installation-labels

Clear labels for connection are shown on the center frame and arms. The connection sequence is also indicated to help avoid incorrect installation.

Quick Installation Of Landing Skid

quick-installation-of-landing-skid

Simple assembly and disassembly of the S800 landing skid, makes it convenient to carry and transport. When installed, it can support heavy weights.

Perfect WooKong-M Compatibility

perfect-wookong-m-compatibility

A WooKong-M IMU installation position has been reserved on the center frame. In addition, labels on the center frame helps users install the flight control system correctly and quickly.

DJI spreading wings S800 is a very good UAV, it can give you longer shooting time, and you can also use this UAV to take some 2.5KG weight things, I think it will be very funny. I haven’t use DJI spreading wings S800, I only know it form some videos or news, if you have a DJI spreading wings S800, I hope you can share some experience about DJI spreading wings S800, Thanks.

Article sourcehttp://rcfpvplane.com/dji-spreading-wings-s800/

Talk about the different between 3S and 4S lipo

When you build a mini quadcopter, there are many questions you will meet. For example, how to choose the lipo batteries? What’s the different between 3S lipo battery and 4S lipo battery? How to choose the motors?…I have knew more about lipo battery, and today I will talk about the different between 3S and 4S lipo battery.

Gens Ace 1300mAh 3S 25C Lipo battery

First you must know what is 3S lipo battery? what is 4S lipo battery? I have one article is about these, and now I will have a simple description. When you bought a Gens Ace 1300mAh 3S 25C lipo battery, the “3S” is the voltage of this lipo battery; as we know, 1S=1 cell= 3.7V, so 3s=3cell= 11.1V. So 4S lipo battery is a 11.1V lipo. I advise you can read this article:The analysis of lipo battery  parameters to know more about lipo battery knowledge.

The next step is talking about the different between 3S and 4S lipo for mini quadcopter. It’s kind of obvious, the main difference is voltage that powers the motors. In my experience with cobra motors, the speed of my quad goes up a lot because of the extra 1S.

Let’s say we have a 2300KV motor, when powered under 3S lipo (12.6V), RPM (rotation per minute) is 2300 x 12.6 = 28900 (in theory). That means the motor spins 28,900 times a minute with no load. When you power the same motor with 4S lipo (16.4V), the RPM is 2300 x 16.4 = 37720, a huge increase in RPM.

Increase in RPM means more thrust, more power, and your quadcopter flies faster. However, the relationship of motor thrust and voltage is not linear due to efficiency loss. Some motors perform well in 3S, but not as good as expected in 4S where most energy just transforms into heat. Apart from thrust, we also need to consider other aspects such as torque, current draw etc. The easiest way to determine if your motor is suitable for 4S is to search for thrust data table, or test it yourself. Some motors rated for 3S simply cannot run on 4S, where the high voltage/current could damage and burn the wires.

Some might ask if a 3S quadcopter can out perform a 4S quad, the answer is definitely yes. Many factors come into play that can determine the speed of a quadcopter: combination of motors and propellers, weight, etc. But under the same condition, a multirotor that runs on higher cell count battery should have more power thus faster.

Also note that 4S setup are usually a little heavier than 3S, because of the additional weight of the voltage regulator, and heavier batteries. Like many high capacity batteries are all heavier than low capacity batteries. So you can accord your need to choose the voltage of your battery. If you want to build a racing quadcopter, I advise you can bought a 4S lipo with high discharge, like Tattu 1300mAh 4s 75C lipo battery.

Article source: http://rcfpvplane.com/difference-between-a-3s-and-4s-setup-for-mini-quadcopter/


How to choose Propellers When you build a quadcopter

I think most people which like to build a quadcopter have a problem is “how to choose propellers “. In fact, propellers are the same important to motors and lipo batteries. As we know, most people usually choose brushless motors and famous lipo batteries(like Gens Ace & Tattu); but for the propellers, they may know less about them, so this article will tell you the knowledge of the propellers and teach you how to choose propellers.

Choosing Propellers

The Basics – Size/Pitch

On every quadcopter, there are two CW (clockwise) and two CCW (counter-clockwise) propellers. There are propellers of different length and pitch. For example 9×4.7 (sometimes 9047) propellers are 9 inch long and has a pitch of 4.7 inch. 5x3x3 (sometimes 5030×3) means 3-blade 5″ propeller that has a pitch of 3 inch.

The Size of a propeller is measured from tip to tip, and it’s sometimes called diameter, as when you spin up a prop you get a circle and the diameter is the size of the prop.

Pitch is sometimes called pitch length too, which can be defined as the travel distance of one single prop rotation.

Generally, either increased propeller pitch or diameter will lead to higher current draw, because more air is moved (assuming RPM is the same), and it gets harder to spin. In a nutshell, larger propeller or higher pitch length will increase your vehicle speed but also use more power.

choosing-propellers-for-your-quadcopter-02

Effects of Prop Size and Pitch

When deciding on prop size, length and pitch, you need to find a good balance.

Generally a prop with lower pitch numbers can spin faster (higher RPM), the motors don’t need to work as hard to spin it so it pulls less current. If you want to do acrobatics, you will need lower pitch propellers which provide higher acceleration and it puts less pressure on the power system. Lower pitch propellers will also improve stability.

A higher pitch propeller moves greater amount of air, which could create turbulence and cause more prop wash. It generates more thrust in the expense of higher current draw, but giving you higher top speed.

A smaller prop is easier to stop and speed up while a larger prop takes longer to change RPM due to inertia.

Material

Propellers can be made of different materials, plastic, carbon fibre, wood etc. Each type of material gives unique features, for example carbon fibre and wooden props are stiff and best known for their smooth performance, certain plastic compound are very durable… check out this post for more info.

Shape

The shape of the propeller also plays a big part in performance. The most distinctive difference would probably be the tip of the props: pointy nose, bull nose (BN) and Hybrid bullnose (HBN). Basically for propellers that are the same size and pitch, pointy tip props are the most efficient however pulls less thrust. Bullnose props can pull higher in thrust number, however they also draw a lot more current. This is due to the fact that they have a larger surface area than than the pointy tip props. And HBN props is in between the two.

Choosing Propellers

Number of Blades

The most common propellers are probably 2 blades (or dual-blade). The next up is Tri-blade which is also very popular among racers and freestylers. You can sometimes even see quad-blade and even hex-blade. Basically, the more blade a prop has, the more surface area and thus can generate more thrust. However that also leads to higher current draw and lower efficiency.

choosing-propellers-for-your-quadcopter-04

Testing is Only for Reference

It’s important to check out motor thrust tests, and see which props work better with the motors you plan to run. Same propeller can perform very differently on 2 different motors.

Even the for props of the same size and pitch, when they are made of different material and by different manufacturers, the performance also tend to be very different. Here is an example where I compare the 5030 props of two different brands.

However these bench tests are done in static environment, and therefore it doesn’t represent the motor/propellers true performance in the wild – where air are moving and there are many other factors that can have some effect on it. One of the most noticeable difference between static bench test and real flight is motor thrust, which is normally 5%-10% less in real flight than in static bench test.

Conclusion

With a well propeller combination, your quadcopter should achieve great efficiency, not only improve battery life time, but also allows great user control experience. Hope this post has helped you select the best propellers.

Source: http://rcfpvplane.com/choosing-propellers-for-your-quadcopter/